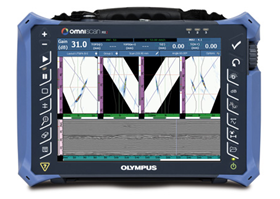
Time of Flight Diffraction (TOFD) is an advanced method of Ultrasonic inspection that leverages on existing UT methodologies thereby bringing a whole new range of testing and detection capabilities to the NDT forefront.
Whilst conventional ultrasonics uses shear/transverse waves as the primary mode of detection, TOFD uses longitudinal waves as the primary detection mode. Ultrasonic sensors are placed on each side of the weld. One sensor transmits the ultrasonic beam into the material and the other sensor receives both reflected and diffracted ultrasound from anomalies and geometric reflectors.
Using ultrasonic beam spread, TOFD provides a wide area of coverage for anomaly detection in the material being tested. When the beam impinges on a flaw tip, it is diffracted in all directions. Measurement of the time of flight of this diffracted beam enables accurate and reliable flaw detection and sizing. This is the case even if the crack is not oriented to the intial beam direction. During typical TOFD inspections, A-scans are collected and used to create B-scan (side view) images of the weld. Post acquisition analysis is done using software to measure the flaw length and through-wall height.
The primary advantages of using TOFD over conventional UT are:
- Based on diffraction, so relatively indifferent to weld bevel angles and flaw orientation
- Uses time of arrival of signals received from crack tips for accurate defect positioning and sizing
- Precise sizing capability makes it an ideal flaw monitoring method
- Quick to set up and perform an inspection, as a single beam offers a large area of coverage
- Rapid scanning with imaging and full data recording
- Can also be used for detecting irregularly shaped areas of metal lossduring corrosion inspections
- Required equipment is more economical than phased array, due to conventional nature (single pulser and receiver) and use of conventional probes
- Highly sensitive to all weld flaw types

LMATS professionals are highly trained and experienced in TOFD ultrasonic testing for various core industrial sectors. Our expertise in using state of the art equipment such as the Olympus OmniScan MX2 (pictured above) has allowed us to perform specific testing in:
- Inspection of high pressure and high temperature piping welds at power station sites on circumferential and seam welds between 20mm to 75mm wall thickness.
- Sizing of known defects has been performed all around the country on pipeline welding, high pressure vessels, bifurcation lines and valve bodies. A generated analysis report outlining the sizing of detects can be provided to the client for their reference.

