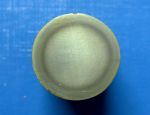
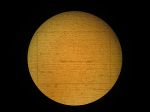
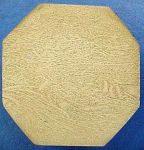
Macro examination is performed on the cross section, longitudinal section or 'Z' direction ( through thickness) as an independent test to evaluate subsurface conditions or as an subsequent step of another test to reveal the effects on the subsurface.
Generally macro test or examination is performed at less than 10x magnification. 


Several semi-finished and samples of finished products are subjected to macro test to reveal internal discontinuities such as impurities, inclusions in rolled products or grain flow in forgings after exposure to appropriate preparation and exposure to chemicals or heat.
Macro test is also performed on the test specimens exposed to other tests such corrosion resistance test, passivation, salt spray test, case depth measurement. The most common test is weld cross section examination to reveal internal discontinuities, weld profile, weld passes and sequence, extent of penetration and the quality of weld.
LMATS performs weld macro examination everyday to satisfy the requirements of huge fabrication industry in Australia.
LMATS Melbourne & Sydney laboratories performs macro examination in accordance with AS 2205.5, ASME IX QW 183, QW 184, EN 1321, AS 1554, AS 3992, AS 2885.2 and similar national and international standards.
Macro Test or Macro Examination
LMATS Services
LMATS provide advanced testing and inspection services in Melbourne Victoria, Sydney - NSW and Brisbane Queensland, Tasmania, South Australia in the following Sectors:
-
Advanced NDT - ECA Eddy Current Array test
-
Advanced NDT - PAUT Phased Array Ultrasonic test
-
Advanced NDT - TOFD Time of Flight Diffraction
-
Advanced NDT - CRT Computed Radiographic testing
-
NDT - Non-destructive testing - RT, UT, ET, MT, PT
-
Coatings Inspection - NACE
-
Pressure vessel Inspection AICIP & Conformity
-
Chemical analysis (Spark Spectroscopy)
-
Third party Inspection & expert Witness
-
Quality Audit & NDT Level 3 services
-
Hydrostatic pressure test
-
PMI - Positive Material Identification (XRF).
-
Weld (WPS / WPQR) qualification test
-
Mechanical testing (engineering)
-
Corrosion Resistance Test
-
Metallurgical services
-
Failure investigation
-
Concrete testing - GPR, thickness, strength.
Advanced NDT Capabilities
Guided Wave LRUT, PEC (Pulsed Eddy current), ECA (Eddy Current Array), ACFM, ACPD, PAUT, Hydroform, TOFD, CRT, Heat exchanger tube testing - IRIS, RFT, NFT, NFA (Near Field Array), MFL tank floor, SteerRover.
LMATS has a wide range of innovative advanced NDT capabilities. Call us on 1300 707 365 to find out more, or explore LMATS Advanced NDT Solutions.

