ACFM – Alternating Current Field Measurement
Reliable crack length & depth sizing of surface breaking cracks through thick coating
ACFM is an electromagnetic NDT test method for the detection and sizing of surface breaking discontinuities which can be scanned through a thick protective surface coating.

Technology:
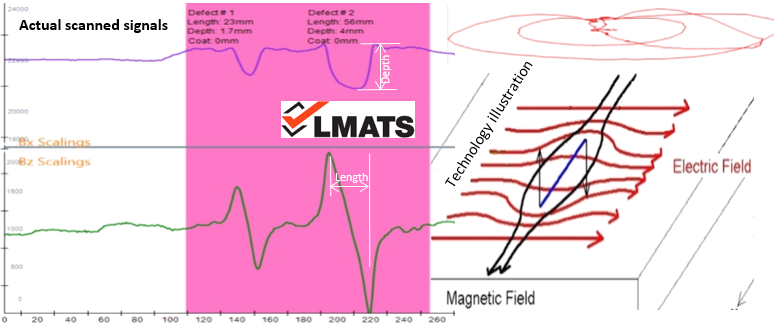
- ACFM probe introduces an alternating current into the test surface (under the probe footprint) to detect surface-breaking cracks.
- If a crack is present, then the current flows around the ends and down the edges of a discontinuity.
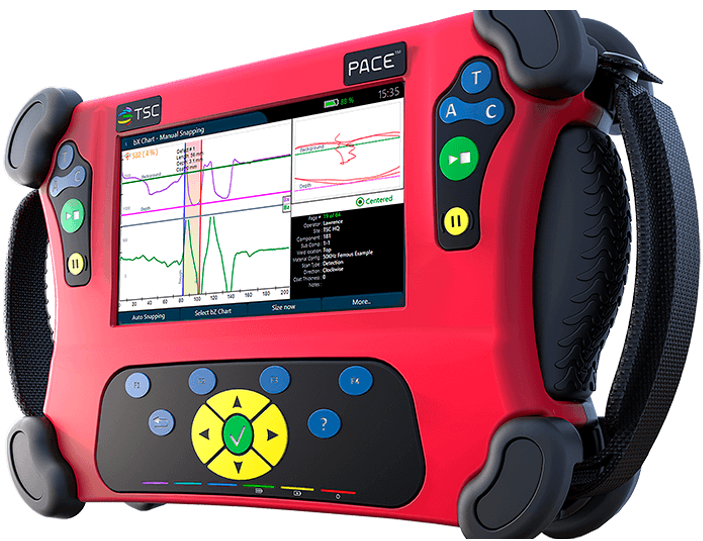
- The disturbed electromagnetic field returned signal is instantaneously converted by advanced algorithm modelling to display a typical crack like signature pattern on the ACFM instrument screen.
- The mathematical modelling provides accurate dimensions of a crack e.g. length and depth.

Features:
- Excellent NDT method for base material as well as weld through coating.
- Surface coating can be conductive and non-conductive coating.
- Can be performed on ferritic, duplex or non-ferritic materials.
- Test surface temperature can be up to 4000 C
- Portable handheld (shoulder belt strapped) instrumentation, IP65 rated
- Higher production output due to ease in recording and reporting discontinuities.
- Best method for underwater testing compared to traditional MT.
- Sensitivity higher than conventional ET and better than ECA on thick coated parts.
Advantages:
- No need to remove surface coating, zinc-based coatings, rust, or surface oxide
- Negligible cleaning of the surface coating. Cost savings in surface preparation.
- Accurate and repeatable depth sizing of surface breaking cracks (Longitudinal and transverse).
- Scanned data can be captured and stored on electronic storage devices.
- Higher probability of detection as compared to traditional ET.
- Faster than ACPD or ET. Similar speed to LMATS ECA – Eddy Current Array testing
- Environmental sustainability by eliminating chemical usage.
Applications:
- Best NDT method for the sub-sea and offshore industry.
- In-service structures, pressure equipment, pipelines, piping, nozzles, and storage tanks.
- Oil, Gas and Power: Offshore drill rig structural welds inspection through thick non-metallic coating.
- Mining: Mill gear teeth, rail components, structural welds.
- Transportation vessel: Various critical structural welds, pipe welds, critical surface area under fatigue loading.
- Rails head, web and flange using a custom design probe for higher efficiency.
- Drill pipe threads and other similar products.
- Infrastructure, bridges, cranes & towers.
Limitations:
- Weld repairs and localized grinding can cause spurious indications.
- Non-uniform weld profile such as sharp edges and corners can indicate erroneous signals.
- Lower sensitivity on smaller (short / shallow) discontinuities. In such circumstances, LMATS ECA – Eddy Current Array testing shall be applied.
- Not suitable for hot rolled linear discontinuities such as stringers, laps because the trapped high temperature oxide can introduce error crack depth measurement.
- Depth measurement can be affected for an inclined crack.
- Better for linear discontinuities rather than volumetric discontinuities.
Expertise:
- Compared to other surface NDT, ACFM instrumentation and the software is complex and thus expensive.
- This test method requires highly trained, skilled, and experienced personnel.
- LMATS has trained, certified and experienced personnel to provide ACFM testing services.
- LMATS offers ACFM testing from our Australia wide branches currently in Perth, Melbourne, Sydney, Newcastle, Albury, and Brisbane.
- LMATS regularly performs ACFM testing in VIC -Victoria, NSW - New South Wales, QLD - Queensland, WA - Western Australian, SA - South Australia, TAS - Tasmania, NT -Northern Territory and some of the neighbouring countries at request.
- To find more about ACFM advanced NDT capability, contact one of LMATS laboratories nearest to your location or call 1300 707 365
Frequently asked questions:
FAQ1– What is the level of surface preparation required at the ACFM contact point?
Answer– If the coating system is of good quality and adequately adhered to the pipe surface then no additional need for surface preparation. If the coating condition is of unacceptable quality or flaking off, then it is recommended to remove surface coating for obtaining precise and repeatable test results.
FAQ2– What is the minimum length or a depth that can be detected by ACFM?
Answer– The minimum discontinuity length that can be generally detected is 5mm and the detectable depth is generally 1mm. The accuracy can further reduce when multiple discontinuities are clustered. There are several lab-based trials that reveal that smaller discontinuities can be detected on ideal materials, but the field conditions are always different than the lab conditions. For detecting and measuring smaller discontinuities or shallower discontinuities such as 500micros stringer, LMATS ECA – Eddy Current Array testing should be utilised.
FAQ3– Can ACFM detect sub-surface defects or volumetric discontinuities?
Answer– Certainly not in ferrous materials. Theoretically, sub-surface discontinuities in non-ferrous metals can be detected by ACFM if they are near the surface. But, LMATS ultrasound-based test methods such as PAUT, TOFD, CRT are better in such circumstances.

